Creating KDE Applications: Compiling
Introduction
Before a machine can run C++ software, the source code needs to be compiled. If you're new to programming, don't skip the first introduction. It explains some terminology used in this article.
Required software
To compile the examples in this chapter, you need to have certain software packages installed. Some of the other packages mentioned here are required to compile more complex C++ applications, like KDE applications.
- gcc / gcc-c++
- GCC is the compiler we'll use. Some Linux systems also have a separate GCC package for C++ support.
- make
-
Make is the tool used to execute build-scripts (
Makefilefiles). In time those files got more complex and new layers of abstraction were added to create those files dynamically, hence automake and autoconf were introduced. - autoconf & autoconf
-
Automake and Autoconf are part of the GNU build system
(the Makefile.in and ./configure stuff).
They create the ./configure script,
and automake creates the
Makefile.infiles from yourMakefile.amfiles. Once you start ./configure, the placeholders inMakefile.inare replaced with your system values and stored in the finalMakefilefiles. - M4 (dependency of automake)
- M4 is the traditional UNIX macro processing tool, and automake is one of the tools using M4.
- "devel packages"
-
Some Linux distributions (including SUSE and Redhat) ship their C/C++ header
files in different "developer" packages.
You need to install those separately, and the version numbers should
stay in sync. In my humble opinion, it's a lot of trouble for saving
a few MB's of disk space.
Anyway, make sure you have to following packages installed:glibc-devel,libstdc++-devel,kdelibs-devel,arts-devel,qt3-devel,qt3-devel-tools,xfree-devel(orx-devel,xorg-x11-devel),libpng-devel,libjpeg-devel,libfam-devel,freetype2-devel,gettext-devel,libxml2-devel,zlib-devel. This should be sufficient to compile KDE applications. Just look for packages ending with "-devel" or "-dev" in your package manager, and install all their dependencies too.
- Just to let you know...

Without the correct header files (developer packages) available, ./configure scripts usually fail to detect all software. The compiling and linking of the software also fails if there is an incompatibility between the binary package and it's header files.
Once you have the software installed, we can start with compiling.
Compiling
Processor architectures
As stated in the first tutorial, compiling is the process that translates your source-text into machine code. But it's good to be familliar with the concept "architecture":
Each computer-type has a different kind of machine code. Most desktop computers follow the same i386 (Intel 386) specification, the so called 32-bit PC-architecture. Other architectures include Sparc (Sun stations) and PowerPC (Apple computers). Note they are different and applications are not binary compatible between these different architectures.
If you like to distribute your program to these different architectures, you need to build different packages for each of these archtectures. By default, the compiler uses the archtecture of your system off course.
Compiling in Linux: gcc and g++
The compiler software mostly used in Linux is gcc, the GNU C Compiler. For C++ code, there is a little cousin called g++. That program calls gcc with the default language set to C++, and automatically links against the C++ library. On many systems, g++ is also installed with the name c++.
This is how you tell g++ to compile your source file:
- Compiling a file:
g++ -o foo foo.cpp
This creates an executable called "foo", and you can run it with ./foo.
Creating a simple program
First, write the following code in a text editor, and save it as hello.cpp:
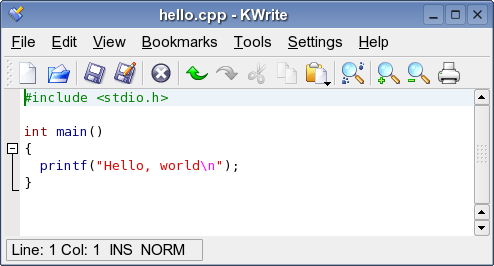 Creating hello.cpp in KWrite
Then try to compile it:
- Compiling hello.cpp:
g++ -o hello hello.cpp
Once the program is compiled, you should see a new file/executable in your current folder, and try to run it:
- Running your application:
./hello
If everything went OK, you should see the message "Hello, world" at your terminal screen.
Explaining the code
The program you've compiled isn't really hard to understand, but perhaps it's complicated already if you haven't written code before. This is what the program code does:
- #include <stdio.h>
-
The include line loads
stdio.h, the Standard-I/O header file. This file is usually located at/usr/include/stdio.h, and it's part of the standard C library. It contains the declarations of all kind of functions you can use, like printf().- Just to let you know...
A declaration only promises the compiler that a symbol (like printf) will eventually be available in the executable while it's being linked. Unless the function is part of the standard C/C++ library, you need to tell the compiler in which object file or library it can find other symbols. This is a very important concept to know!
- int main() { ... }
- The main() function is always the starting point of the application. The "int" in front of the function name represents the type of data the function returns, in this case a 4-byte integer (a number without decimals). Between the curly bracklets you'll find the body of the main() function. The main() function will start automatically, and the instructions within the function body will be executed one by one. If the main() function ends, the program quits.
- printf("Hello, world\n");
-
The printf() function was declared in the
stdio.hfile, and we can use it now. It simply prints the given parameter to the output-steam (called stdout in UNIX terminology). Note you can pass parameter information to a function call between those round bracklets. Each instruction ends with a semicolon. - The text between the quotes is called a "string" [of characters, not underwear]. Within each string, the compiler translates the \n symbol to a newline-character.
Note we didn't use any C++-specific functions in the source code. All code was in fact standard ANSI C-code. The real C++ implementation would look a little different:
The pure C++ version of hello.cpp
The C++ version uses the << output steam operator, this operator can be extended to support other data instead of standard strings. We also imports features from the standard C++ library and import the "std" namespace because we had to write "std::cout" and "std::endl" otherwise.
Compiling multiple files
Especially if programs get big, it takes a lot of time to compile all source files each time. That's why we compile each source file into an object-file first, and link them all together at the end of the compilation process. We only have to re-compile the modified source files in a second run.
- Compiling multiple files:
g++ -c foo1.o foo1.cpp
g++ -c foo2.o foo2.cpp
g++ -o foo foo1.o foo2.o
The first two steps create the object files foo1.o
and foo2.o. The final executable is linked from these object files.
A simple build script
The process above can be automated with a simple Makefile script:
- Makefile:
OBJECTS=foo1.o foo2.o

foo: $(OBJECTS)
	g++ -o foo $(OBJECTS)

foo1.o: foo1.cpp foo1.h
	g++ -c foo1.o foo1.cpp

foo2.o: foo2.cpp foo2.h
	g++ -c foo2.o foo2.cpp

clean:
	rm -f foo $(OBJECTS)
The $(OBJECTS) variable is replaced by "foo1.o foo2.o" automatically.
- Just to let you know...
Note that the Makefile commands need to be indented with a TAB character!!
This is how make works:
-
The following tells make that the target
foorequiresfoo1.oandfoo2.oto be present:
foo: foo1.o foo2.o
- Next, make also checks whether those requirements are present, it builds a dependency-tree of all these rules.
-
The target
foo1.oappears to requirefoo1.cppandfoo1.h. You can use g++ -M to get a list of the dependencies for each C++ file. -
If
foo1.ois out-of-date, make runs the specified commands to re-buildfoo1.o.
This causes make to:
- build
foo1.oiffoo1.cpporfoo1.his changed - rebuild
fooiffoo1.oorfoo2.owas updated.
And that's all you need for a simple build script!
The "clean"-target doesn't have any dependencies, make will always run those target-commands if you type make clean. If you run make without specifying a target, the first target is used.
Linking against libraries
Now that you understand a little about building software, you need to know how gcc links against libraries as well. You need to use certain parameters for this:
- Linking against KDE and Qt:
g++ -l qt -l kdecore \
# link against libqt.so and libkdecore.so-L ${QTDIR}/lib \# Look for libraries here-L ${KDEDIR}/lib \# ...and also here-I ${QTDIR}/include \# Look for header files here-I ${KDEDIR}/include \# ...and also herehello.cpp -o hello# And compile hello.cpp into "hello"
These g++ arguments are useful to know:
Argument Action -c file Translate a source file in an object file -o file Specifies the executable name (output). -I directory Specifies a location to look for include files
(header files).-i file Specifies a header file to include -L directory Specifies a location to look for library files. -l library Specifies a library to link against. -D directive Specifies a compiler directive
(same as #define in the C++ code).-M file Returns all dependencies of the given C++ file, for inclusion in a Makefile.
These kind of commands are nice for testing environments, but you can't expect each users system to have the same facilities available. That's where the build system jumps in. That aspect will be explained in one the next parts.
External Links
blog comments powered by Disqus